In This Topic
Overview
Here we provide you with step by step process how to start using GdPicture.NET with Delphi and C++ Builder.
Please follow these steps on how to successfully integrate GdPicture.NET in this environment. For better understanding, we demonstrate the steps in Delphi environment on the attached snapshots below.
You can find two sample projects demonstrating the usage of some GdPicture.NET features in the folder [INSTALLATION FOLDER]\Samples\WinForm\delphi using com interop .
IntelliSense is fully supported.
Integration
You have two options here how to integrate.
Import as ActiveX Control
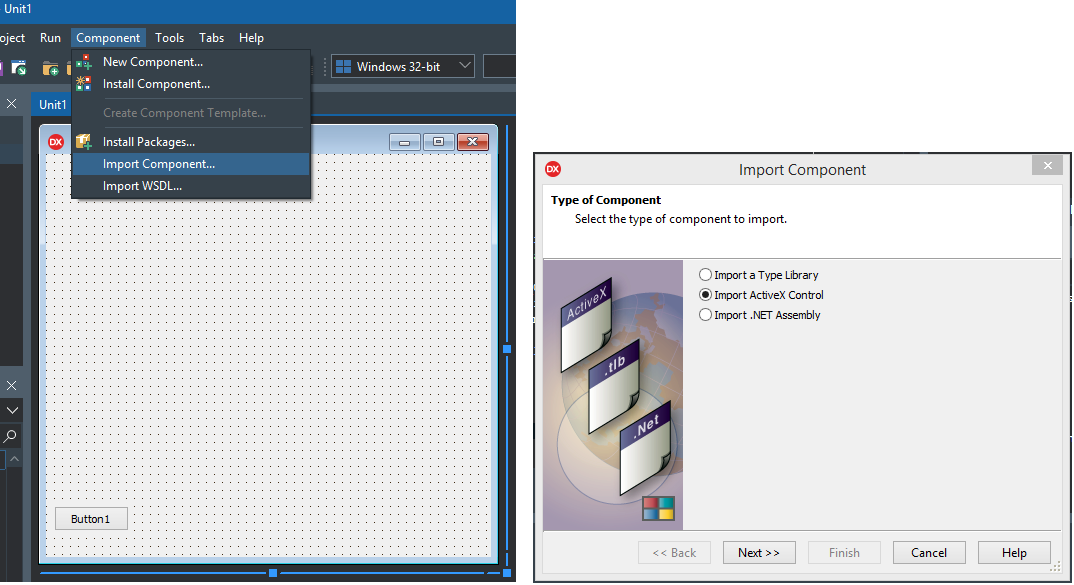
- Start a new project in your Delphi environment and click "Component" in the application menu and select "Import Component...". Then select "Import ActiveX Control" option and click Next.
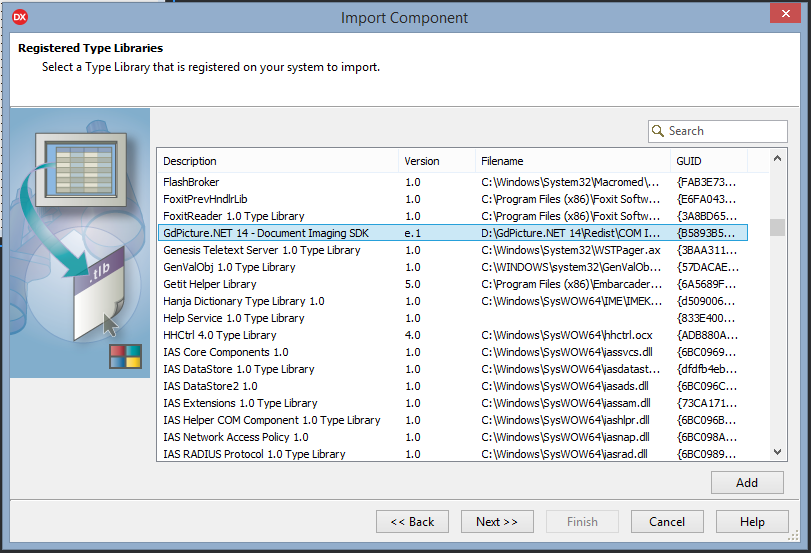
- Scroll the list and select the "GdPicture.NET 14 - Document Imaging SDK", then click Next.
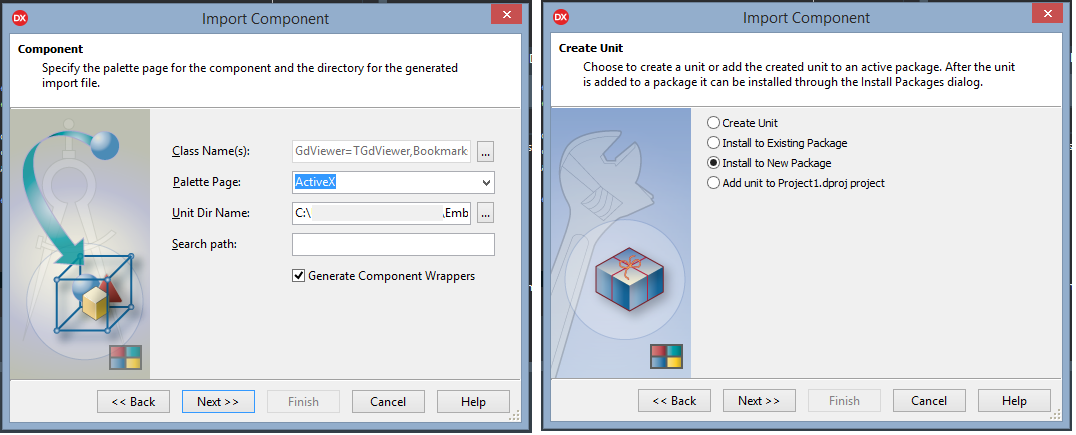
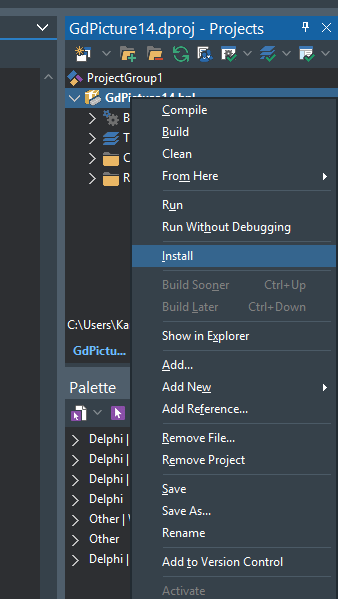
- In the Class Name(s) you will see all classes available for import. The Palette Page should be ActiveX. Check also the Unit Dir Name if it is as you want. Select the "Generate Component Wrappers" checkbox and finally click Next. Further select the "Install To New Package" option and click Next.
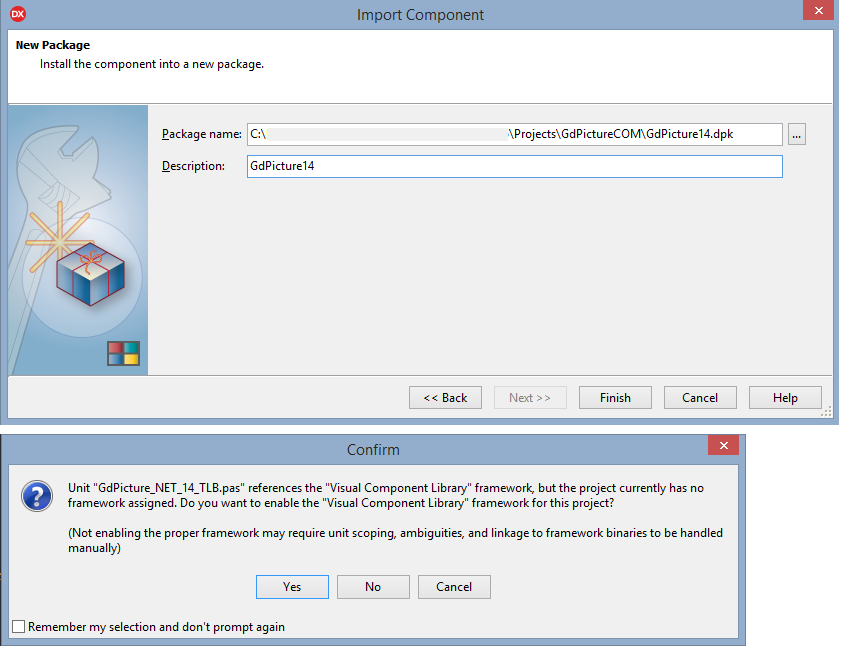
- Browse for the proper path and add it as the Package name and click Finish. Finally add and confirm the framework with Yes.
- Build the package. You will need to change all UIntPtr to Cardinal in the GdPicture_NET_14_TLB.pas. After the successful building, you need to install the package.
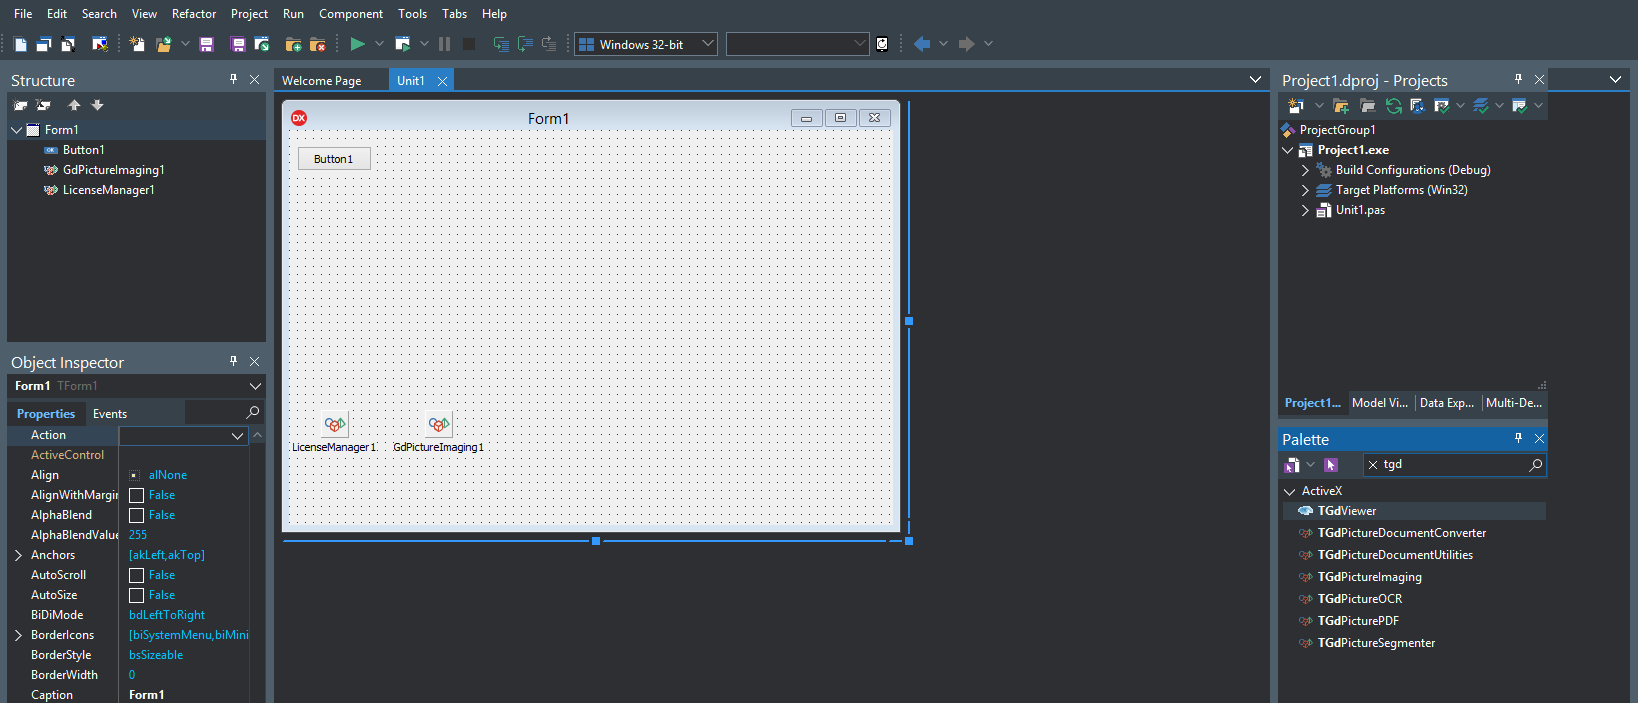
- Finally create your project, select your favorite components from ActiveX palette and you use them in your application.
- Floating point exceptions must be turned to Off in Delphi by using:
//Set8087CW($133f); only for 32-bit app.

SetExceptionMask(exAllArithmeticExceptions); //only for 64-bit app, requires uses Math
- Floating point exceptions must be turned to Off in C++ Builder by using:
#include <WTypes.h>

Set8087CW(0x133f);
Please find a very simple code snippet demonstrating the usage of the toolkit below the integration steps.
Example of usage
| How to load a TIFF file and save it as BMP. |
Copy Code |
procedure Test;

var TiffImageID, Status  : Integer;

begin

     LicenseManager1.RegisterKEY('XXX');    //Please, replace XXX by a valid demo or commercial KEY

     TiffImageID  := GdPictureImaging1.CreateGdPictureImageFromFile('d:\test.tif');

     Status := GdPictureImaging1.SaveAsBMP(TiffImageID, 'd:\output.bmp');

     if Status  <> 0 then

          MessageBox(0,Pchar('Error saving file. Status: ' + inttostr(Status)),'', 0)

     else

          MessageBox(0,Pchar('Done'),'', 0);

end; |
Import a Type Library
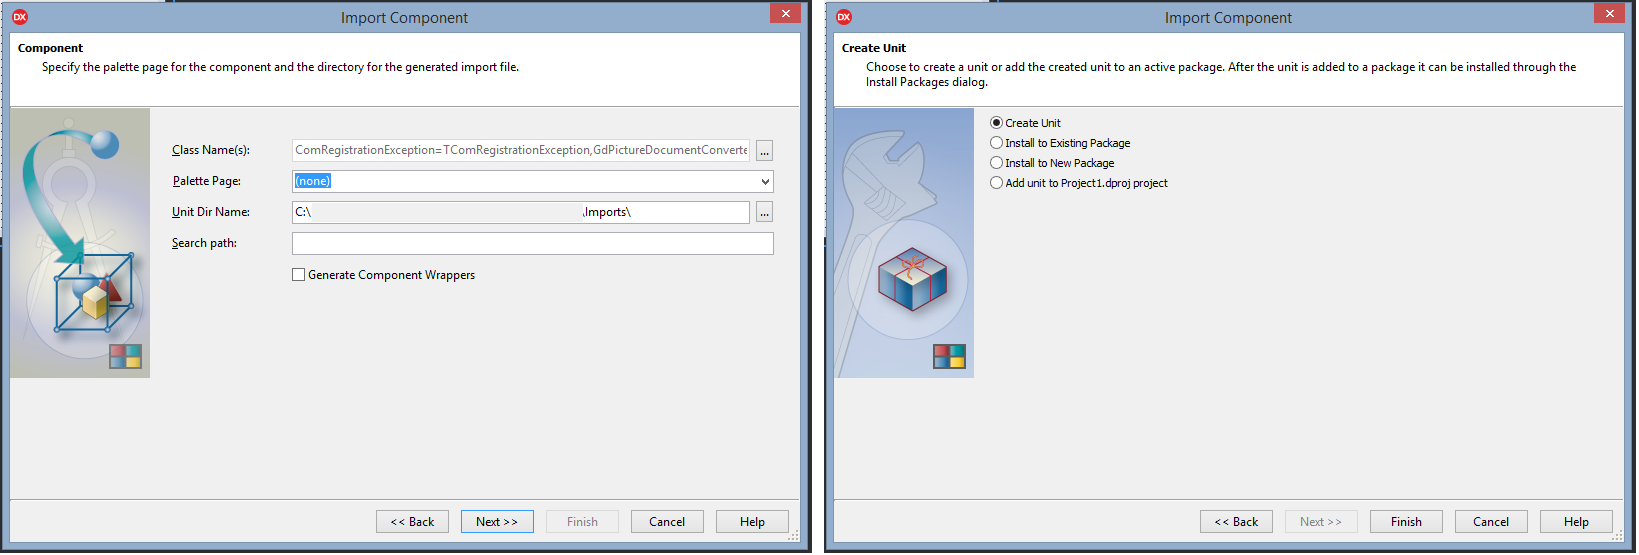
- Start a new project in your Delphi environment and click "Component" in the application menu and select "Import Component...". Then select "Import a Type Library" option and click Next.
- Scroll the list and select the "GdPicture.NET 14 - Document Imaging SDK", then click Next.
- In the Class Name(s) you will see all classes available for import. Check also the Unit Dir Name if it is as you want, leave the "Generate Component Wrappers" checkbox empty and finally click Next. Further select the "Create Unit" option and click Finish.
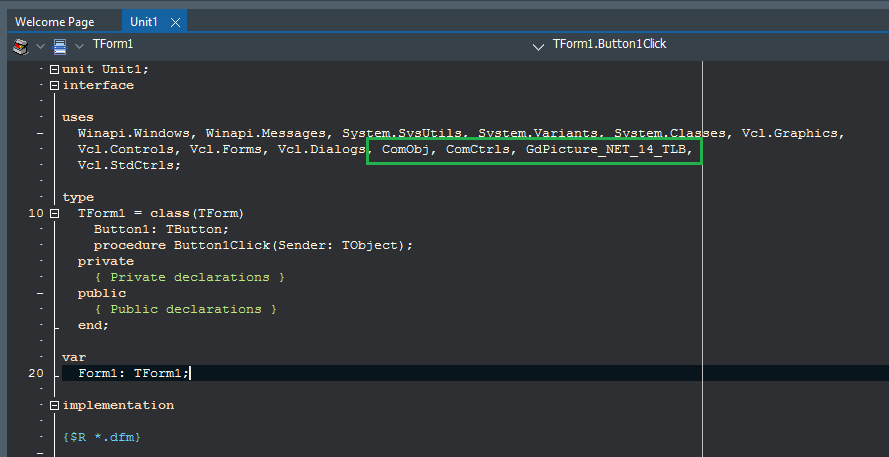
- Include the generated unit into your files using the standard "uses" command and build the application.
Please find a very simple code snippet demonstrating the usage of the toolkit below the integration steps.
Example of usage
| How to load a TIFF file and save it as BMP. |
Copy Code |
procedure Test;

var

  LicenseManager1: Variant;

  GdPictureImaging1: _GdPictureImaging;

  TiffImageID  : Integer;

  Status: Integer;

begin

  LicenseManager1 := CreateOleObject('GdPicture14.LicenseManager');

  LicenseManager1.RegisterKey('XXX');  //Please, replace XXX by a valid demo or commercial KEY

  GdPictureImaging1 := CreateComObject(CLASS_GdPictureImaging) as _GdPictureImaging;

  TiffImageID  := GdPictureImaging1.CreateGdPictureImageFromFile('d:\test.tif');

  Status := GdPictureImaging1.SaveAsBMP(TiffImageID, 'd:\output.bmp');

        if Status  <> 0 then

          MessageBox(0,Pchar('Error saving file. Status: ' + inttostr(Status)),'', 0)

        else

           MessageBox(0,Pchar('Done'),'', 0);

end; |
See Also